|
Today I'm going to show you how you can make convenient garden waterers from used plastic cat litter containers. There are many benefits and few pitfalls when considering this alternative method of watering your vegetation.
Positives:
1) Cost effective. By only watering right around the roots of the plant, you are saving money on your water bill.
2) Helps reduce weed growth. Weeds will not grow as vigorously where they receive less water.
3) No need to un-coil and re-coil your hose reel, or manipulate its movement around the yard.
4) Great for keeping on stand-by. They are extremely handy when you need water on the spur of the moment, such as when you spot a starving plant at dusk.
5) Can help during times of drought when certain water restrictions are in place.
Negatives:
1) Not pretty. In addition, should also be kept out of site when not in use, otherwise may look tacky when kept within view. Empty cans may also blow around your yard when windy.
2) A bit heavy & bulky, therefore not recommended for children, elderly and some adults.
What you will need:
1) Obviously you will need a cat. Alternately, ask a cat-owning friend or family member to save their containers for you.
2) Used cat litter plastic container. Usually, these containers are sold in 14 or 20 pound containers, but occasionally you'll see them in smaller 10 lb versions (such as at Dollar General). Unless you're strong, I would recommend the 14 pound size as I will use in this demonstration (10 pounds doesn't hold enough water to be as effective).
3) Though you can use a hammer & sharp nail to make your holes, the easiest way is to use a drill. For best results, I prefer to drill many holes using smaller sized drill bits, rather than fewer holes with bigger drill bits. Water pouring out from larger holes may bend or damage sensitive or delicate plants.
Step-by-step guide:
Step 1: Rinse out the inside to get rid of any excess cat litter fragments.
Step 2: Prepare your waterer by cutting off the plastic product label.
Step 3: With cap on, drill 10 to 15 holes on top of the cap, spacing them apart as evenly as possible. You can experiment with fewer or more holes to suit your rate of sprinkle.
Step 4 (important): You will need to vent the container to help water pour out faster, smoother & more evenly. To do this, drill 3 more holes at the top of the handle. NOTE: Some water may pour from these holes when watering. To help avoid getting your hands wet, drill these holes closer to the cap as shown in my photo.
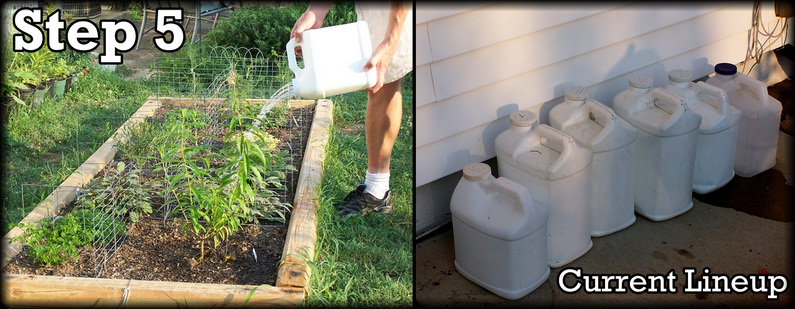
Step 5: Fill with water, transport to your destination, and begin pouring where needed.
NOTE: I keep several of these containers always filled with water (right now I have 6). I have a big back yard so I use a wheelbarrow to transport multiple containers to my destination.
|
|
|
|
|
|


Great idea! For some reason I have never wanted to purchase a watering can, it seems so expensive for what it's used for. Maybe my neighbor has a spare cat litter container!
ReplyDelete