Though it's been hotter than normal yet once again virtually all summer here in the mid-Atlantic states, we've yet to hit triple-digits on a recurring basis -- until now. The weather forecast calls for 100-103 degrees in my area today, Friday & Saturday.
My garden has held up extremely well so far this year. Except for the dying browning leaves of the potato plants (which is normal in any year/climate), my garden is maintaining its lush green hue.
But now it's time to get serious - to show what man vs. nature can do.
First & foremost, do not pay attention to the 'heat index' - rather focus your attention only on the temperature. The heat index measures a combination of temperature and humidity, and indicates how it feels to us humans. Since humidity is actually moisture content in the air, plants are not as negatively affected by it as humans. In fact, one can argue that plants (especially those tropical in nature - such as tomatoes & peppers) may actually benefit from the natural wetness humidity brings to the air. So even though we humans may suffer more when it's hot & humid as opposed to hot & dry, plants react opposite.
Develop a good watering 'game plan.'
1) Prioritize which plants need to be watered more & most frequently. Pay special attention to wilting or dying plants, and vegetation that naturally relies on more watering, such as melons, tomatoes etc. New plants also need more water than established ones because they are still trying to grow & establish roots needed for long-term survival.
 2) During the heat wave, watering should only be attempted early in the morning or later in the evening. Mid-day watering may cause the moisture to evaporate more quickly and/or result in wilting of leaves. Generally speaking, try not to water between the hours of 10am & 7pm. 2) During the heat wave, watering should only be attempted early in the morning or later in the evening. Mid-day watering may cause the moisture to evaporate more quickly and/or result in wilting of leaves. Generally speaking, try not to water between the hours of 10am & 7pm.
3) Before watering, allow the sun-heated water already inside the hose to exit before spraying in & around your vegetation. The plants are already stressed and pouring 150 degree water on them cannot be good. NOTE: I have recently read stories of people pouring ice cubes around their plants. This, too, actually stresses the plants rather than help them. Do not do this.
4) Using a hoe, self-irrigate or create temporary water flow channels as I show in this post. If you happen to get a rain shower, this helps direct excess water where it's most needed.
5) To also help prevent water run-off on dry hard dirt, loosen soil with a hoe by tilling the radius from between 6 to 18 inches from the plant stem (tilling too close may damage roots). This helps allow the ground to better soak up more moisture, more deeply. Water run-off can also be prevented by watering less more often, rather than watering more less often. In other words, water for 5 minutes twice a day rather than for 10 minutes once.
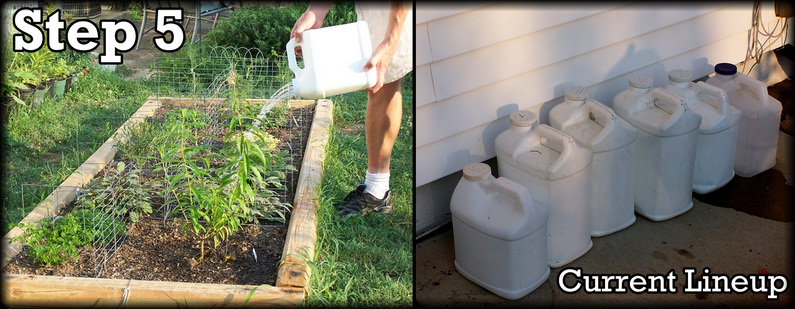
6) Since water on leaves should be avoided, so too should be the use of sprinklers. During hot & arid times, resort to watering with containers (like I explain in this post) or use a hand-held hose. Each method allows you to water only where it's most needed -- at or around the base of the plant. Better yet is the use of a drip irrigation system or a soaker hose. Each waters more slowly right at the soil level, preventing evaporation.
Additional tips.
1) Don't use fertilizer until after the heat wave subsides. Since fertilizer promotes new growth, it also boosts the need for more water.
2) Adding mulch around the plant is more important than ever. One or two inches of mulch helps retain water moisture & prevent the soil from drying out as fast.
3) Don't be afraid to prune back plants that appear to be suffering from the heat wave. However, don't attempt to prune if you're only trying to stimulate new growth - plants challenged by the heatwave will not benefit.
4) Removing weeds is especially important during these scorching, arid times. Each ounce of water is more valuable than ever, and sharing with weeds should not be an option.
5) Avoid spraying your plants with products that contain oil. The extreme heat combined with oil residue left behind may result in leaf burn.
Final word
Use this heat to take a much needed break from gardening -- only harvest & water as needed during the early or late day hours. Consider your time indoors (in air conditioning) like a mini-vacation, or use this extra free time planning your second-half vegetable garden. Lettuce, broccoli, cauliflower (among others) can still be planted going forward in most parts of the country.
And remember, heat waves are usually (but not always) temporary. Exerting extra effort for a few days or few weeks now will reward you with healthier crops going forward.
Resources for this article:
eHow- How to water plants in extreme heat
CBS news- Help your garden through a heat wave
Lohud.com - Coping with a garden in a heat wave
*DISCLAIMER: Before using any information contained in this blog entry, you are advised to do your own due diligence & research on the topic and/or consult with a qualified expert or professional.
|